Making bread with natural yeast, often referred to as a sourdough starter, is a rewarding and fulfilling experience. Not only does it provide a more complex flavor in your bread, but it’s also a great way to connect with the traditional art of bread making. While store-bought yeast is convenient, natural yeast gives your bread that distinctive tangy flavor and chewy texture that many bread enthusiasts love. In this article, we’ll walk you through how to make natural yeast from scratch, step by step.
- What Is Natural Yeast?
Natural yeast is a type of wild yeast that’s found naturally in the air, on the surface of fruits, and in flour itself. Unlike store-bought dry or fresh yeast, which is cultivated in a lab, wild yeast works by fermenting the sugars in the dough over time. This fermentation process not only makes the dough rise but also creates the distinct flavors that sourdough breads are known for.
In addition to wild yeast, your sourdough starter will also contain naturally occurring lactobacilli, bacteria that help develop the tangy flavor in the bread. These bacteria work symbiotically with the yeast, creating a more complex and flavorful loaf compared to breads made with commercial yeast.
- Choosing Your Ingredients
To create a sourdough starter, you’ll need only two basic ingredients: flour and water. However, the type of flour you choose can have a significant impact on your starter’s success.
- Flour: You can use a variety of flours to create your starter, but the best option for beginners is whole grain flours like whole wheat or rye. These flours contain more nutrients and minerals, which help feed the wild yeast and bacteria, giving your starter a strong, healthy start. After the initial stages, you can switch to all-purpose flour if desired, but starting with whole grain flour is recommended.
- Water: It’s important to use non-chlorinated water for your starter. Chlorine, which is often added to tap water to kill bacteria, can also inhibit the growth of your yeast and bacteria. If you have chlorinated tap water, you can let it sit out overnight to allow the chlorine to evaporate, or use filtered water.
- Starting the Process: Day 1
The process of making natural yeast takes about 5 to 7 days, with some variation depending on temperature and humidity. On Day 1, mix together equal parts of flour and water in a clean glass or plastic container. For example, you can start with 50 grams of whole wheat flour and 50 grams of water (about ¼ cup of each). Stir them together until there are no dry spots, cover the container loosely with a lid or cloth, and let it sit at room temperature (around 70°F or 21°C) for 24 hours.
During the first day, you may not notice much happening, but don’t worry! The wild yeast and bacteria are starting to make their way into the mixture and will begin their work soon.
- Feeding Your Starter: Day 2 to Day 7
Starting on Day 2, you should begin feeding your starter once a day. To feed it, discard about half of the starter (this helps keep the yeast population manageable and ensures that the mixture isn’t too large) and add equal parts of flour and water—again, about 50 grams of flour and 50 grams of water. Stir it together, cover it loosely, and let it rest at room temperature.
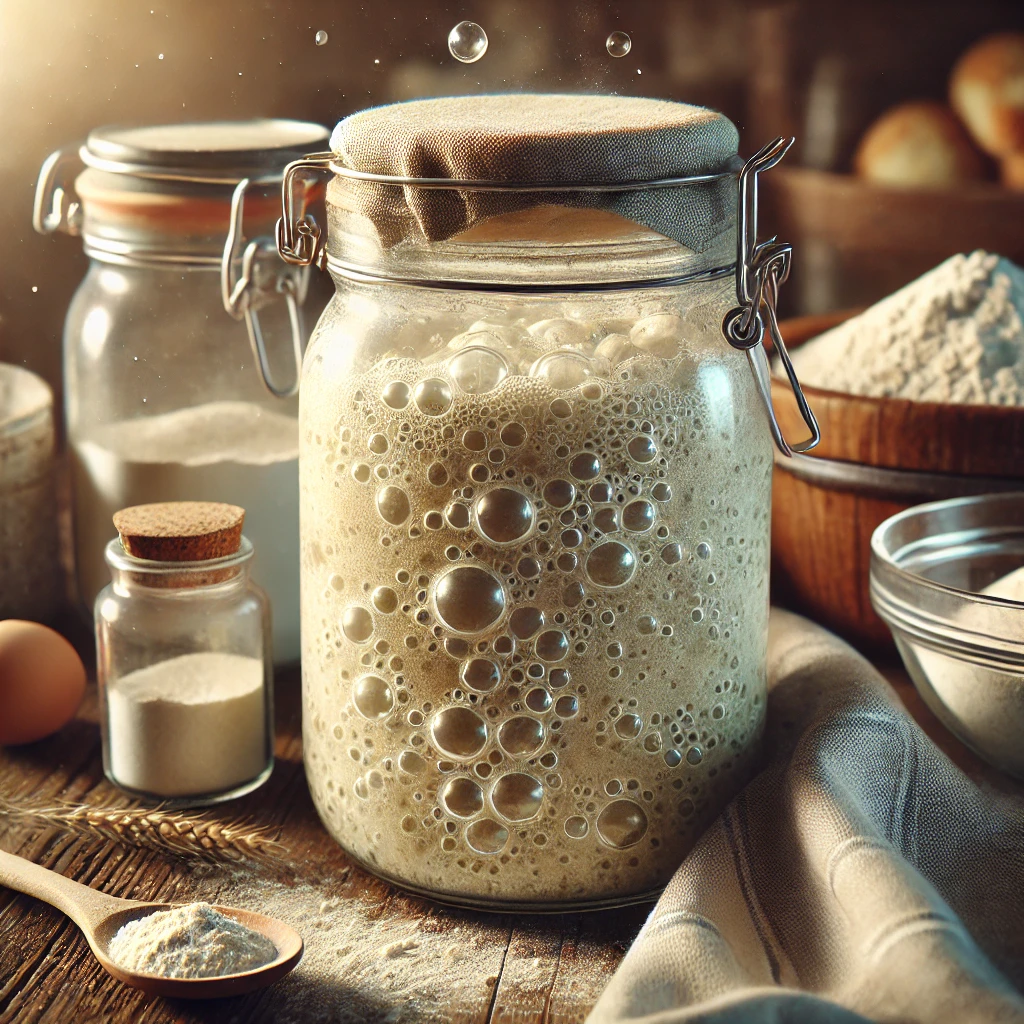
By Day 2 or 3, you should start seeing small bubbles forming on the surface, a sign that fermentation is beginning. The starter should also begin to develop a slightly sour smell, which is a good sign that the wild yeast and bacteria are thriving.
As the days pass, you’ll continue the feeding process, and your starter will become more active. The bubbles will increase in number, and the smell will become stronger. You may also notice the starter doubling in size after each feeding. This is a sign that the yeast is growing stronger, and your starter is becoming more mature.
- Signs That Your Starter Is Ready
By Day 5 to 7, your starter should be ready to use. You’ll know it’s ready when:
- Bubbles: Your starter should be bubbly and have a lot of activity. The surface should be dotted with small bubbles, and you should see a noticeable rise in volume after each feeding.
- Doubling in Size: Your starter should double in size within 4 to 6 hours after being fed.
- Sour Smell: The smell should be tangy and slightly sour, indicating that the lactobacilli are working well.
- Float Test: To test if your starter is fully active and ready to bake with, take a small spoonful and drop it in a glass of water. If it floats, it’s ready to use. If it sinks, continue feeding it for another day or two before testing again.
- Using Your Starter for Baking
Once your starter is ready, you can use it to bake your first loaf of natural yeast bread! Start by using a basic sourdough bread recipe. The process will involve mixing the starter with flour, water, and salt to form your dough, and then allowing it to ferment and rise over time.
- Maintaining Your Starter
After your starter is active, you’ll need to maintain it to keep it healthy. If you bake frequently, you can continue feeding it daily. If you bake less often, you can store your starter in the fridge and feed it once a week. To feed it, remove it from the fridge, discard half, and refresh it with equal parts flour and water. Let it sit at room temperature for a few hours before returning it to the fridge.
- Troubleshooting Tips
If your starter doesn’t seem to be growing or developing properly, there are a few things to check:
- Temperature: Make sure the starter is kept in a warm, draft-free area. If the temperature is too low, fermentation will slow down.
- Water Quality: Ensure you’re using non-chlorinated water.
- Flour: Whole wheat or rye flour is ideal for the first few days, as it’s richer in nutrients than all-purpose flour.