Baking bread at home can be incredibly rewarding, but it’s also easy to make mistakes—especially when you’re just starting out. Fortunately, most of these mistakes can be avoided with the right knowledge and techniques. In this article, we’ll explore some of the most common mistakes beginners make when baking bread and provide helpful tips to ensure your bread turns out perfectly every time.
- Not Measuring Ingredients Accurately
One of the biggest mistakes beginners make is not measuring their ingredients accurately. Baking is a science, and even a small change in the proportions of ingredients can affect the outcome. Whether you’re measuring flour, water, or yeast, it’s essential to use a kitchen scale for accuracy. Using measuring cups for flour, for example, can result in inconsistent amounts since flour can be packed or sifted in different ways.
Tip: Invest in a kitchen scale and use it for more accurate measurements, especially when working with flour. This will help you achieve a consistent dough every time.
- Using the Wrong Type of Yeast
There are several types of yeast available for baking, and it’s important to use the right one for your recipe. Beginners often use instant yeast or dry yeast interchangeably without understanding the differences. Instant yeast is more convenient because it doesn’t need to be dissolved in water, while active dry yeast needs to be dissolved in warm water before being added to the dough.
Tip: Check your recipe carefully to determine whether you should use instant or active dry yeast. If you’re using a different type than called for, you may need to adjust the amount or method of incorporation.
- Not Letting the Dough Rise Enough
Rushing through the fermentation process is a common mistake. Many beginners overlook the importance of allowing the dough to rise properly during both the bulk fermentation and final proofing stages. Failing to give the dough enough time to rise can result in dense, heavy bread with poor texture.
Tip: Be patient and let your dough rise properly. The dough should double in size during the first rise, and during the second rise, it should be puffy but not overproofed. If you’re short on time, you can speed up the process by using a slightly warmer environment, but don’t rush it too much.
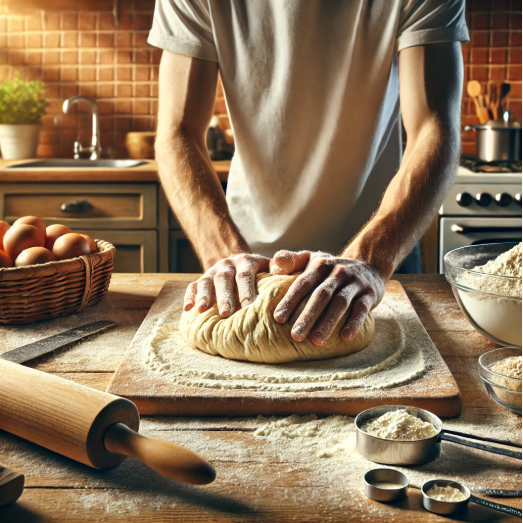
- Over-Kneading or Under-Kneading the Dough
Kneading dough helps develop the gluten network, which gives your bread its structure. However, kneading it for too long or too aggressively can make the bread tough, while under-kneading can result in a dough that lacks the elasticity needed for proper rise and texture.
Tip: Knead the dough until it is smooth and elastic, which usually takes around 8–10 minutes. If you’re unsure, try the windowpane test: Stretch a small piece of dough between your fingers; if it forms a thin membrane without tearing, it’s ready.
- Using Too Much Flour
Adding too much flour to your dough is another common mistake. While it’s tempting to add more flour when the dough feels sticky, doing so can lead to dry, dense bread. A slightly sticky dough is normal and necessary for a soft, airy crumb.
Tip: Instead of adding flour, try wetting your hands or using a dough scraper to handle the dough. If the dough sticks to the surface, it’s okay—just keep it slightly hydrated for better results.
- Not Giving the Dough Enough Time to Rest
Allowing your dough to rest is essential to ensure a good rise. Skipping the resting period or rushing through it can lead to dough that doesn’t rise properly and results in dense, flat bread. Resting helps the dough relax and develop flavor, especially in longer fermentation methods.
Tip: Plan your baking time carefully to allow for sufficient resting periods, especially after kneading and before baking. You can even let your dough rest in the fridge overnight to develop more flavor.
- Baking at the Wrong Temperature
The temperature of your oven plays a crucial role in how your bread turns out. Baking bread at a temperature that’s too low can result in dense bread, while baking at too high a temperature can cause the crust to burn before the inside is fully cooked.
Tip: Preheat your oven to the correct temperature (usually between 350°F and 450°F or 175°C and 230°C) before putting your bread in. Make sure your oven is fully heated to ensure even baking.
- Not Using Steam for the Perfect Crust
One of the secrets to getting a perfect crust is introducing steam into your oven during the first few minutes of baking. Steam helps the bread rise quickly and gives it a beautiful golden-brown color. Many beginners forget to create steam, which results in a crust that is too thick or pale.
Tip: Place a pan of water in the oven or spritz your dough with water before baking to create steam. Alternatively, you can bake the bread in a Dutch oven, which traps moisture and helps develop a beautiful crust.
- Cutting Into the Bread Too Early
After baking, it’s tempting to cut into the bread right away, especially when it smells so delicious. However, cutting into the bread while it’s still hot can cause it to collapse and affect the texture. Allowing the bread to cool properly is essential to set the crumb and avoid gummy or undercooked slices.
Tip: Let your bread cool for at least 30 minutes before slicing it. This gives the bread time to finish cooking and allows the crumb to firm up.
- Not Experimenting Enough
Finally, one of the most common mistakes is being afraid to experiment. Bread-making is as much about learning through trial and error as it is about following recipes. Beginners often stick to the same recipe and method without experimenting with new techniques, flours, or flavor additions.
Tip: Don’t be afraid to try new things! Experiment with different types of flour, herbs, or seeds to personalize your bread and create new flavors. Bread-making is a skill that improves with practice and exploration.