Baking bread in a home oven might seem like a challenge, especially when you compare your results to professional bakery loaves. But the truth is, with a few smart techniques and a better understanding of how your oven works, you can bake incredible bread right in your own kitchen. In this guide, we’ll walk you through everything you need to know to get the most out of your home oven and achieve bakery-level results.
- Understanding Your Oven’s Personality
Every oven has its own quirks. Some run hot, others have uneven heat distribution, and a few might not retain heat as well. That’s why one of the first steps to baking great bread at home is understanding how your oven behaves.
Tip: Use an oven thermometer to check the actual internal temperature. Set your oven to a specific temp and compare the thermometer’s reading. Adjust as needed and always preheat thoroughly before baking.
- Preheating is Non-Negotiable
Preheating your oven is crucial for proper oven spring—the rapid rise that occurs during the first few minutes of baking. Most artisan-style bread benefits from a hot start, which helps create that beautiful, tall loaf with a crisp crust.
Tip: Preheat your oven for at least 30 minutes at 450°F (230°C) if you’re baking rustic loaves. For sandwich breads or enriched doughs, a temperature around 375°F (190°C) may be more appropriate, depending on the recipe.
- Using Steam for the Crust
Professional bread ovens inject steam during the first phase of baking. This steam helps keep the crust soft while the bread expands, resulting in a higher rise and shinier, crispier crust. While your home oven doesn’t have a steam button, there are a few simple ways to create steam at home.
Methods to Add Steam:
- Place a metal pan (not glass) on the bottom rack of the oven while it preheats. When you add your bread, pour about ½ cup of hot water into the pan and quickly close the oven door.
- Spray the inside of your oven walls with water just before baking and again 5 minutes into the bake.
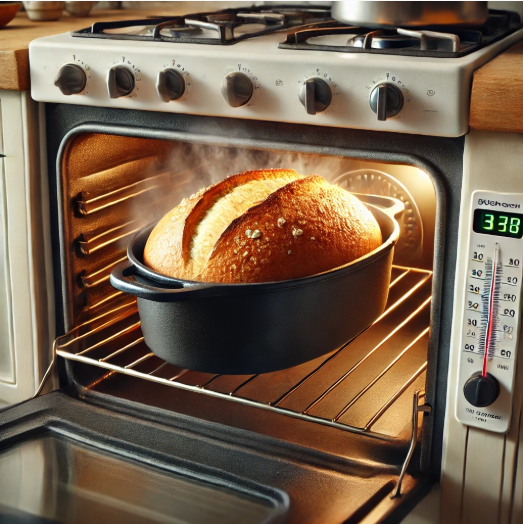
- Cover the bread for the first 20 minutes of baking using a Dutch oven or an inverted metal bowl over a baking stone.
- The Magic of the Dutch Oven
A Dutch oven is one of the best tools for baking bread in a home oven. Its thick walls and tight-fitting lid trap steam naturally, mimicking the environment of a commercial bread oven. You get excellent oven spring and a gorgeous crust without extra effort.
Tip: Place your shaped dough into a parchment-lined Dutch oven, cover with the lid, and bake at a high temperature. After 20–25 minutes, remove the lid and continue baking until the crust is golden and the loaf sounds hollow when tapped.
- Baking Stones and Baking Steel
If you’re not using a Dutch oven, a baking stone or baking steel can greatly improve the quality of your bread. These tools retain and radiate heat, which helps your bread bake evenly from the bottom up, creating a better oven spring and a crisper base.
Tip: Place the stone or steel in the oven while it preheats. Then transfer your bread onto the hot surface using a peel or parchment paper.
- Rack Positioning Matters
Where you place your bread in the oven can influence how it bakes. The middle rack is generally the safest and most even position. If you’re using a baking stone or steel, you might consider placing it on the lower middle rack to get a crisp bottom without over-browning the top.
Tip: Avoid placing your bread too close to the top heating element unless you want an extra-dark crust.
- Oven Door Etiquette
Resist the urge to open the oven door repeatedly. Each time you do, you let heat and steam escape, which can prevent your bread from rising properly and cooking evenly. Timing and trust are key!
Tip: If your oven has a window and light, use them to keep an eye on your loaf without opening the door.
- Use the Right Bake Time and Temperature
The ideal temperature and bake time depend on the type of bread you’re making. Rustic, crusty loaves like sourdough usually need 25–45 minutes at 450°F (230°C), while softer sandwich loaves often bake at 350°F to 375°F (175°C–190°C) for 30–40 minutes.
Tip: A digital instant-read thermometer can help determine when your bread is done. For most loaves, an internal temperature of 190°F to 210°F (88°C–99°C) is ideal.
- Cooling in the Oven (Optional Trick)
Once your bread is finished baking, you can turn off the oven, crack the door slightly, and let the loaf sit for another 5 to 10 minutes. This helps crisp up the crust even more and prevents sudden changes in temperature that could cause the loaf to collapse slightly.
- Cooling After Baking
Always allow your bread to cool fully on a wire rack before slicing. Bread continues to “bake” internally after coming out of the oven, and cutting too early can lead to a gummy texture. For best results, wait at least 30 minutes—or more for larger, denser loaves.
With a few smart techniques and a little practice, your home oven can become a powerful tool for creating amazing bread. The more you bake, the better you’ll understand how your oven behaves—and the more delicious your loaves will become.