Kneading dough is one of the most essential—and therapeutic—steps in bread making. It develops the gluten network that gives your bread structure, chew, and elasticity. While it might seem simple, many beginners either under-knead or over-knead their dough, which can affect the final texture of the bread.
In this article, you’ll learn everything you need to know about kneading dough the right way—by hand or with a stand mixer—and how to tell when your dough is perfectly kneaded.
- Why Kneading Is Important
Gluten is a protein found in wheat flour. When flour is mixed with water, gluten strands begin to form. Kneading aligns these strands into a strong, stretchy network that traps the gas released by yeast, allowing the dough to rise and hold its shape.
Without kneading, your bread might turn out flat, dense, or crumbly. Proper kneading is the key to achieving an airy crumb and beautiful oven spring.
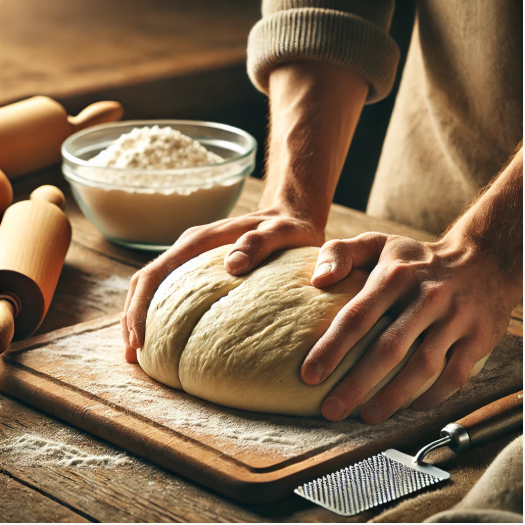
- Hand Kneading: Classic and Reliable
Kneading by hand gives you a strong connection with your dough and helps you develop a feel for its texture and readiness. It takes time and energy, but it’s also a satisfying, almost meditative process.
Basic steps to knead by hand:
- Lightly flour your surface and turn out the dough.
- Use the heel of your hand to push the dough away from you.
- Fold the dough back over itself, rotate it 90 degrees, and repeat.
- Continue this rhythm for 8 to 10 minutes.
Tips for hand kneading:
- Don’t add too much flour. The dough may be sticky at first, but adding too much flour can make the bread dry and tough.
- Use a dough scraper to help handle sticky dough and keep your work surface clean.
- Rest the dough briefly if it resists stretching—it may just need time to relax.
- Stand Mixer Kneading: Efficient and Hands-Free
Using a stand mixer with a dough hook is a convenient alternative to kneading by hand, especially for high-hydration doughs or when baking in larger quantities.
How to knead with a mixer:
- Mix your dough ingredients in the bowl using the dough hook.
- Start on low speed until the dough comes together, then increase to medium.
- Knead for 5 to 7 minutes, occasionally pausing to scrape down the sides of the bowl.
Tips:
- Watch the dough, not the clock. If it’s sticking excessively to the sides or bottom, it may need more flour or time.
- Don’t walk away—stand mixers can over-knead if left unattended.
- The Windowpane Test: Your Best Friend
How do you know when your dough is kneaded enough? The most reliable method is the windowpane test.
How to perform it:
- Pinch off a small piece of dough.
- Gently stretch it between your fingers into a thin, translucent “window.”
- If it stretches without tearing and you can see light through it, the gluten is well developed.
If the dough tears or feels rough, keep kneading a few more minutes and test again.
- What Happens If You Under-Knead?
Under-kneaded dough can be sticky, shaggy, and lacking structure. It may not rise well and will often bake into a dense, flat loaf. Gluten needs enough time and effort to develop properly.
Signs of under-kneading:
- Dough tears easily when stretched
- Dough feels loose or slack
- The loaf doesn’t hold its shape during proofing or baking
- What Happens If You Over-Knead?
It’s rare to over-knead by hand, but it can happen quickly with a mixer. Over-kneaded dough becomes tough and tight, losing its ability to stretch and expand. It may also tear easily, feel rubbery, and bake into a loaf that’s dry or dense.
Signs of over-kneading:
- Dough feels tight, overly elastic, or hard to shape
- It resists stretching and tears quickly
- The crumb is tight and uniform with very few holes
If you suspect over-kneading, let the dough rest for 20 minutes to allow the gluten to relax before shaping.
- Hydration and Kneading Difficulty
The higher the hydration of your dough (the ratio of water to flour), the stickier and harder it is to knead. For very wet doughs, like ciabatta, use the stretch-and-fold method instead of traditional kneading.
How it works:
- Place the dough in a bowl.
- Grab one edge of the dough, stretch it up, and fold it over the center.
- Rotate the bowl and repeat 3 to 4 times.
- Let rest for 20–30 minutes and repeat the process 2 to 3 more times.
This gentle technique builds strength over time and is especially useful for artisan breads.
- Final Tips for Perfect Kneading
- Rest your dough: Letting your dough rest during kneading (called autolyse) can reduce the kneading time needed and improve gluten development.
- Feel the dough: Experience will help you recognize when your dough is smooth, elastic, and ready.
- Practice makes perfect: Don’t stress if it’s not ideal on your first try. You’ll improve with every loaf.
Kneading is one of the most rewarding parts of bread making—it transforms a sticky mess into a beautiful, strong dough ready to rise. With the right technique and a little practice, you’ll soon knead like a pro and bake loaves that are soft, chewy, and perfectly risen.