Bread baking is a joyful and rewarding activity—but it can also turn your kitchen into chaos if you’re not organized. From sticky dough to timers going off and flour getting everywhere, it’s easy for things to spiral out of control. However, with a few simple strategies, you can maintain a calm, clean, and efficient kitchen environment, even while tackling the most involved bread recipes.
In this article, we’ll cover how to stay organized before, during, and after bread baking, so your time in the kitchen remains enjoyable and stress-free.
1. Start with a Clean Slate
Before you even reach for the flour, give your kitchen a quick reset:
- Clear countertops of unrelated items.
- Wash and put away any dirty dishes.
- Wipe down surfaces with a damp cloth.
- Empty the sink so you can use it freely later.
Bread making involves multiple steps and several resting phases. Having a clean space ensures you can move between them without clutter building up or tools getting misplaced.
2. Mise en Place: Measure and Prep Everything First
“Mise en place” is a French culinary term meaning “everything in its place.” Before you begin mixing, measure all your ingredients and place them in small bowls or containers.
This approach helps you:
- Avoid forgetting ingredients (like salt or yeast—easy to miss!)
- Move through the recipe more smoothly
- Spot errors in quantity or ingredient type early
It’s also a great way to avoid messes from reaching into flour bags mid-kneading with sticky hands.
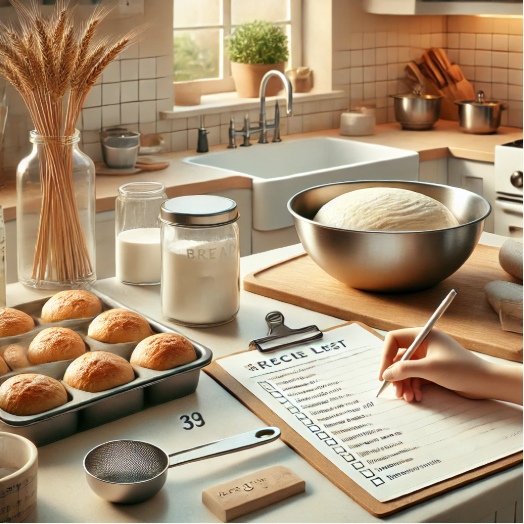
3. Use a Recipe Checklist
Print or write down your recipe and check off steps as you complete them. This is especially helpful for bread recipes that include rest periods, folds, or multiple proofing stages.
Your checklist can include:
- Ingredient prep
- Initial mix
- Autolyse time
- Stretch and fold intervals
- Proofing and shaping
- Bake time and cooling
Keeping track visually helps prevent mistakes, especially if you’re managing multiple tasks.
4. Organize Tools and Equipment Ahead of Time
Gather your key tools before you start mixing. You’ll avoid unnecessary rummaging and reduce stress later.
Common bread-making tools:
- Digital kitchen scale
- Large mixing bowl
- Dough scraper
- Measuring spoons and cups
- Thermometer (for dough and oven)
- Loaf pan or Dutch oven
- Kitchen towel or plastic wrap (for covering)
Lay these out near your work area for easy access.
5. Set Up a Dedicated Bread Station (if possible)
If you bake frequently, consider designating a section of your kitchen as your “bread station.” This can be as simple as a corner of the countertop with:
- A container for flour
- A drawer with your bread tools
- Your go-to bowl and proofing basket
Having a go-to setup reduces the number of decisions and movements needed during each bake.
6. Use Timers and Set Alarms
Bread baking relies heavily on time—whether it’s a 30-minute autolyse, a 2-hour bulk ferment, or a 15-minute final proof.
Pro tip: Use your phone or smart speaker to set multiple timers labeled by task (e.g., “Stretch Fold 1” or “Check Dough Rise”).
This helps you manage long fermentation periods while freeing you up to do other things.
7. Clean As You Go
This classic kitchen rule is a game changer in bread baking. You’ll avoid an overwhelming mess at the end and maintain a workable space throughout.
Try these habits:
- Wipe counters while dough rests
- Wash measuring spoons and bowls immediately after use
- Put away ingredients right after you use them
- Keep a small bowl of warm, soapy water nearby for quick utensil rinses
8. Use Separate Surfaces for Different Tasks
Designate parts of your counter for:
- Mixing
- Shaping
- Cooling
- Slicing
This prevents cross-contamination and gives you physical structure during the baking process.
If you have limited space, use trays, large cutting boards, or rolling mats that can be moved or swapped between stages.
9. Label and Store Doughs and Starters Clearly
If you’re working with sourdough starter or multiple batches of dough, label them with:
- Time of last feeding or mix
- Ingredients
- Next step
Use masking tape and a marker directly on bowls or containers to avoid confusion, especially during long fermentation or cold storage.
10. Have a Cooling and Storage Plan
Don’t wait until the bread is out of the oven to clear space for cooling. Place your wire rack in a spot with good air circulation. Have clean towels ready to cover it, if needed, to keep dust or curious pets away.
Also, prep your storage:
- Bread bags
- Airtight containers
- Freezer-safe wrap if you plan to freeze it
This ensures your fresh loaf stays at peak quality.
11. Keep a Bread Journal Nearby
Having a small notebook or digital log in your baking area allows you to:
- Track recipe changes
- Note rise times based on room temperature
- Reflect on what went well (or didn’t)
- Record how long your starter took to activate
This will improve your organization over time and turn baking into a more intentional routine.
Final Thoughts
Staying organized in the kitchen while baking bread isn’t about perfection—it’s about creating a smooth, enjoyable process that helps you focus on the craft. With a clean space, clear tools, and a bit of preparation, you’ll feel more confident and in control from start to finish.
An organized baker is a relaxed baker—and that’s when the real magic (and flavor) happens.