If you’ve ever come across a professional bread recipe or dived into artisan baking techniques, you’ve likely seen the term autolyse. It might sound complicated, but autolyse is a simple and powerful step that can dramatically improve the texture, flavor, and workability of your bread dough.
In this article, you’ll learn what autolyse is, how to do it, and why it’s a game-changer for anyone serious about baking better bread at home.
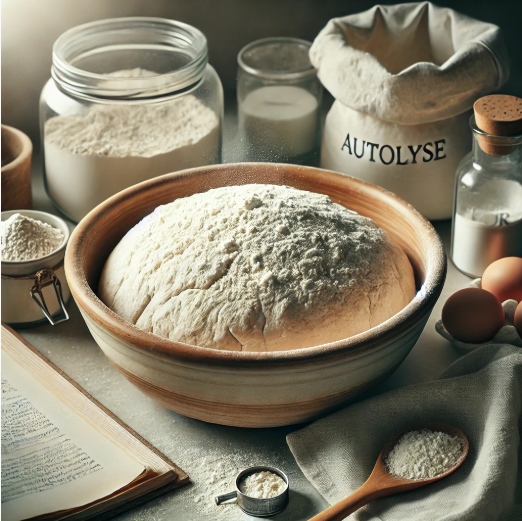
- What Is Autolyse?
Autolyse (pronounced “auto-lees”) is a resting period after you mix only flour and water—before adding any salt or yeast. It typically lasts anywhere from 20 minutes to several hours. During this time, enzymes in the flour begin breaking down starches into sugars and proteins into gluten, kickstarting the development process naturally and gently.
French baker Raymond Calvel introduced the autolyse method in the 1970s, and it’s since become a staple in artisan bread baking.
- Why Autolyse Works
When you mix flour with water, enzymes in the flour—particularly amylase and protease—begin doing their job. Amylase breaks down starches into sugars, feeding the yeast later on, while protease breaks down proteins, which helps in gluten development.
The benefits of autolyse include:
- Improved gluten structure: Your dough becomes stretchier and stronger with less kneading.
- Better hydration: The flour absorbs water more fully, especially important for whole wheat or high-hydration doughs.
- Easier handling: Dough becomes smoother and less sticky, making shaping easier.
- Enhanced flavor: A longer autolyse can lead to better flavor development.
- Softer crumb and thinner crust: Perfect for artisan-style loaves with open crumb.
- How to Autolyse Your Dough
Doing an autolyse is simple, and it adds minimal time to your bread-making process.
Step-by-step:
- Mix your flour and water together until there are no dry spots. You don’t need to knead at this stage.
- Cover the bowl with a towel or lid.
- Let the mixture rest at room temperature for 20 to 60 minutes. Some advanced recipes call for longer autolysis (up to 2 hours), but for most home bakers, 30–45 minutes works well.
- After the rest period, add your yeast and salt and proceed with kneading or stretch-and-folding as usual.
Pro tip: Always add salt and yeast after the autolyse. Salt can inhibit enzymatic activity, and yeast can start fermentation too early, defeating the purpose of the rest.
- When Should You Use Autolyse?
Autolyse is especially helpful for certain types of bread:
- Sourdough: Since it’s often a long, slow fermentation process, autolyse gives the dough a head start.
- High-hydration doughs: Like ciabatta and focaccia, where managing stickiness can be tricky.
- Whole grain breads: These flours take longer to absorb water, and autolyse helps improve the dough texture and elasticity.
- Artisan loaves: If you’re aiming for an open crumb, crackly crust, and complex flavor—autolyse is your friend.
For simpler sandwich loaves or enriched doughs (those with milk, butter, eggs), autolyse may not be necessary, though some bakers still like to include it for added softness.
- Autolyse vs. Fermentolyse: What’s the Difference?
You might come across another term: fermentolyse. This is a variation where you include the starter or yeast in the initial mix (along with flour and water), but still hold back the salt. It combines the benefits of autolyse with early fermentation.
This method is useful if you’re short on time or working with sourdough and want to shorten your bulk fermentation period. However, it requires careful monitoring to avoid over-fermentation during the rest.
- Common Mistakes with Autolyse
While autolyse is simple, a few missteps can reduce its effectiveness:
- Adding salt or yeast too early: This limits enzymatic activity and defeats the purpose.
- Too short or too long a rest: Less than 20 minutes won’t do much. More than 2 hours can lead to over-softened dough that’s harder to shape.
- Not mixing well initially: Make sure all the flour is hydrated. Dry spots will slow enzymatic activity and affect consistency.
- What to Expect After Autolyse
After autolyse, your dough should feel noticeably smoother and easier to stretch. You’ll likely need less kneading overall, and shaping your loaf will be more manageable. During baking, you’ll notice:
- Better oven spring
- More open crumb structure
- A lighter, more delicate interior
- Crisper crust
- Is Autolyse Worth It?
Absolutely. Especially if you’re interested in artisan-style bread or using whole grains, autolyse is a small step that delivers big improvements. It makes your dough more manageable, reduces effort, and enhances flavor—all without any extra ingredients.
Autolyse is a quiet hero in bread baking—a simple pause that allows nature to do its work and elevate your results. Try it in your next bake, and you might never skip it again.